Thursday, March 24, 2016

My DIY Farmhouse Table

Around Thanksgiving last year I made a table. I'm just getting around to blogging about it today. We are absolutely loving it. It was one of the best things I've done for our house. But it was also one of the harder projects I've worked on.

We had a very nice round table already in our dining room. It was a counter height table and did not fit the space very well.


It had also gotten too small for our family.

So I did a little research to find the perfect table for our family and house. I had followed Ana White for some time before this. Her site is the perfect place to find an awesome DIY project. She creates plans that make building easier to understand and not so overwhelming to tackle.

The original plans can be found here. We did alter those plans a little. I wanted a wider table so I made it about 50 inches wide and I made it a little shorter. Our table ended up being about 92 inches long. I followed another person that posted about this same table. She talked about it here how she left out the decorative apron and I liked the look of that better, so that is what I did too. She also talked about how she made her table wider and the changes she made to accommodate that added width.

I started with making the legs. The hardest part was the angle cuts for the bottom of the legs to achieve that rounded look. I have a terrible miter saw that won't properly lock into position, so I had to be very careful. One piece had to be cut at a 30 degree angle and the other at a 45 degree angle.


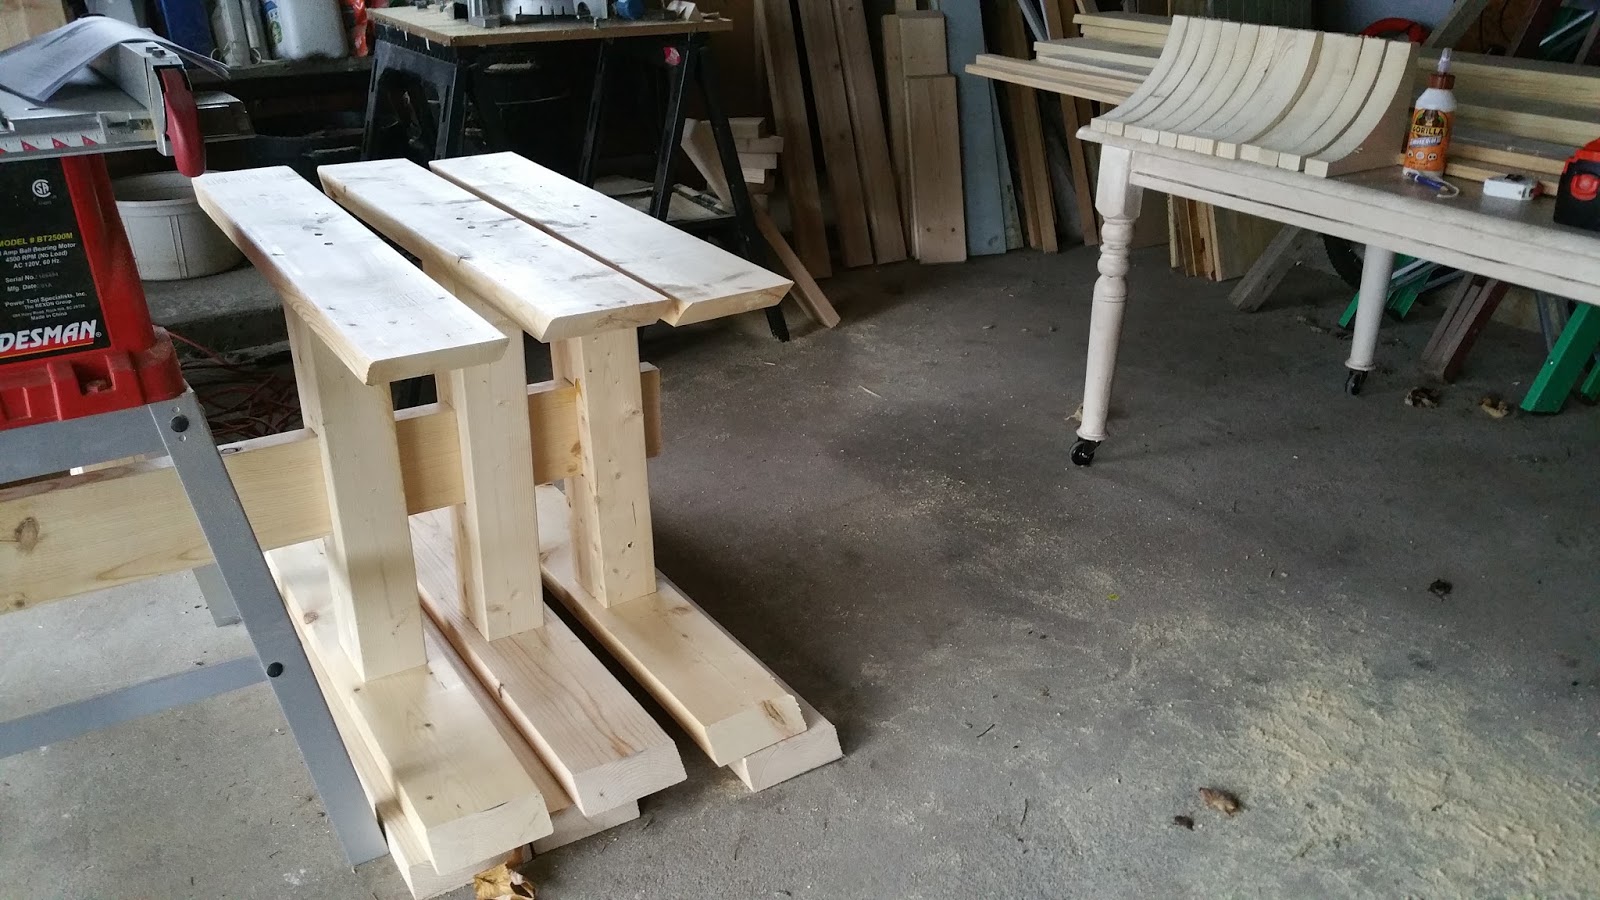
The decorative brackets were also very hard to cut out and to try to get them all the same (or at least as close to the same as I could).

I painted the legs and the stretcher board running through the legs with flat white paint and then put two coats of wax over the top of them. I distressed them a little. Previous to painting the legs I applied a dark stain along the edges where I knew I would be distressing them. After painting I sanded away the paint to reveal the dark stain. Then I waxed everything with Minwax Finishing Wax.


The top was a little harder for me to handle on my own because of the size. I used the kreg jig to connect the inside panels together. Then I did the frame around the panels and connected those with a kreg jig also.

I chose to stain the table top. I used a combination of Minwax Early American (which is what I used on my floors) and topped it with Minwax Dark Walnut. After that I sealed it was a couple coats of Poly and it was done!


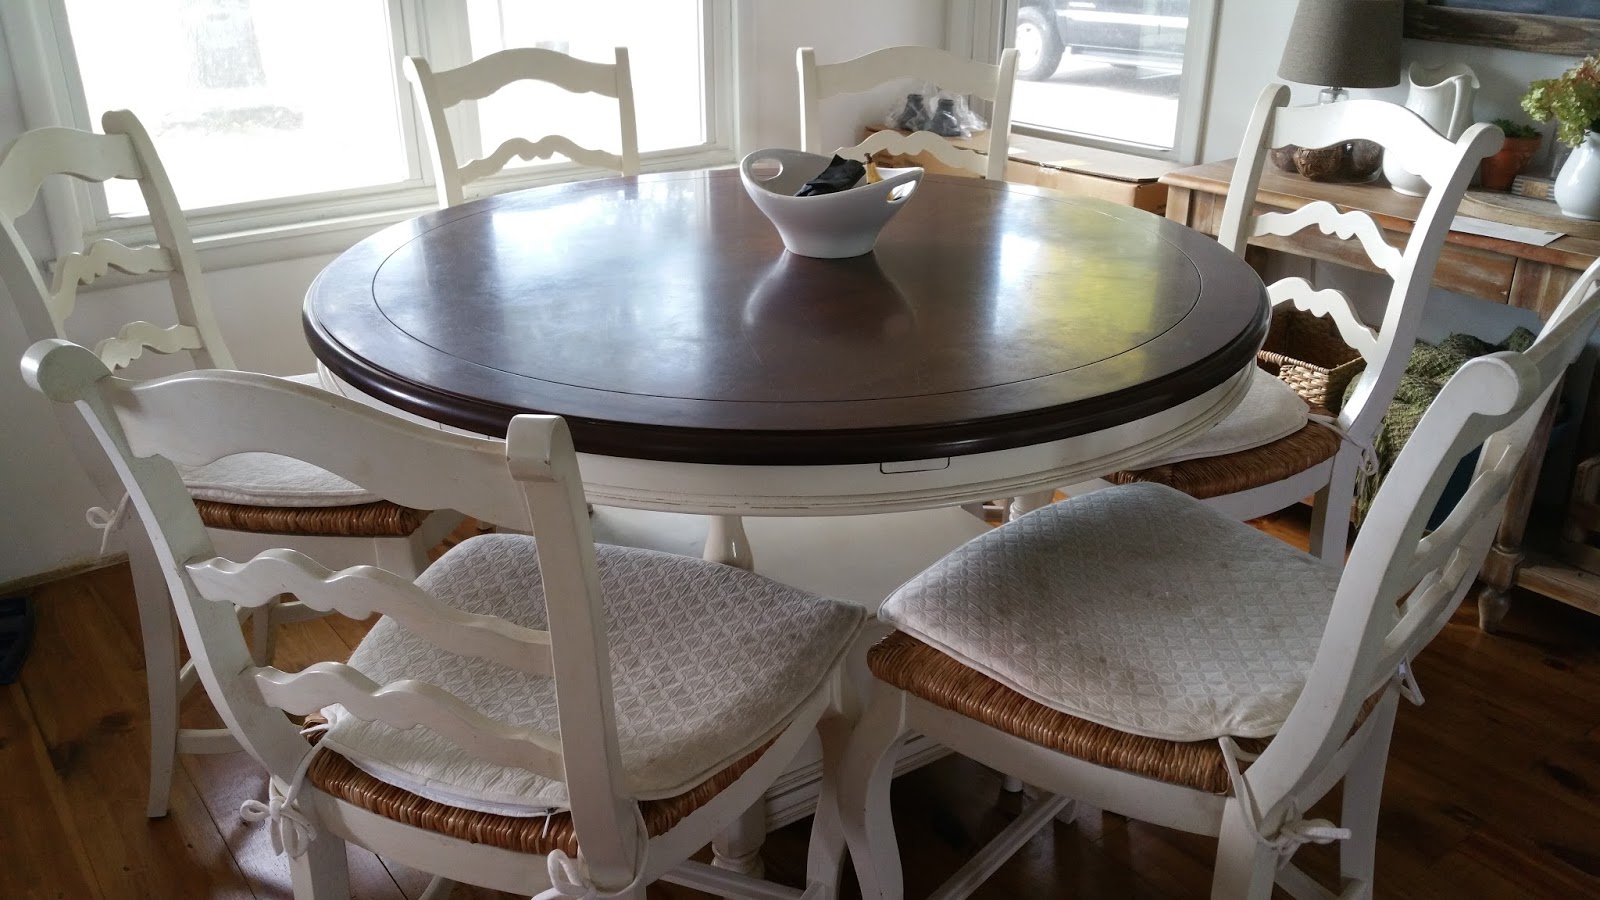
And then to top it off I found six chairs and a table (I left the table there) at Goodwill for $20!


A few cans of spray paint later and I am so very happy with the results!


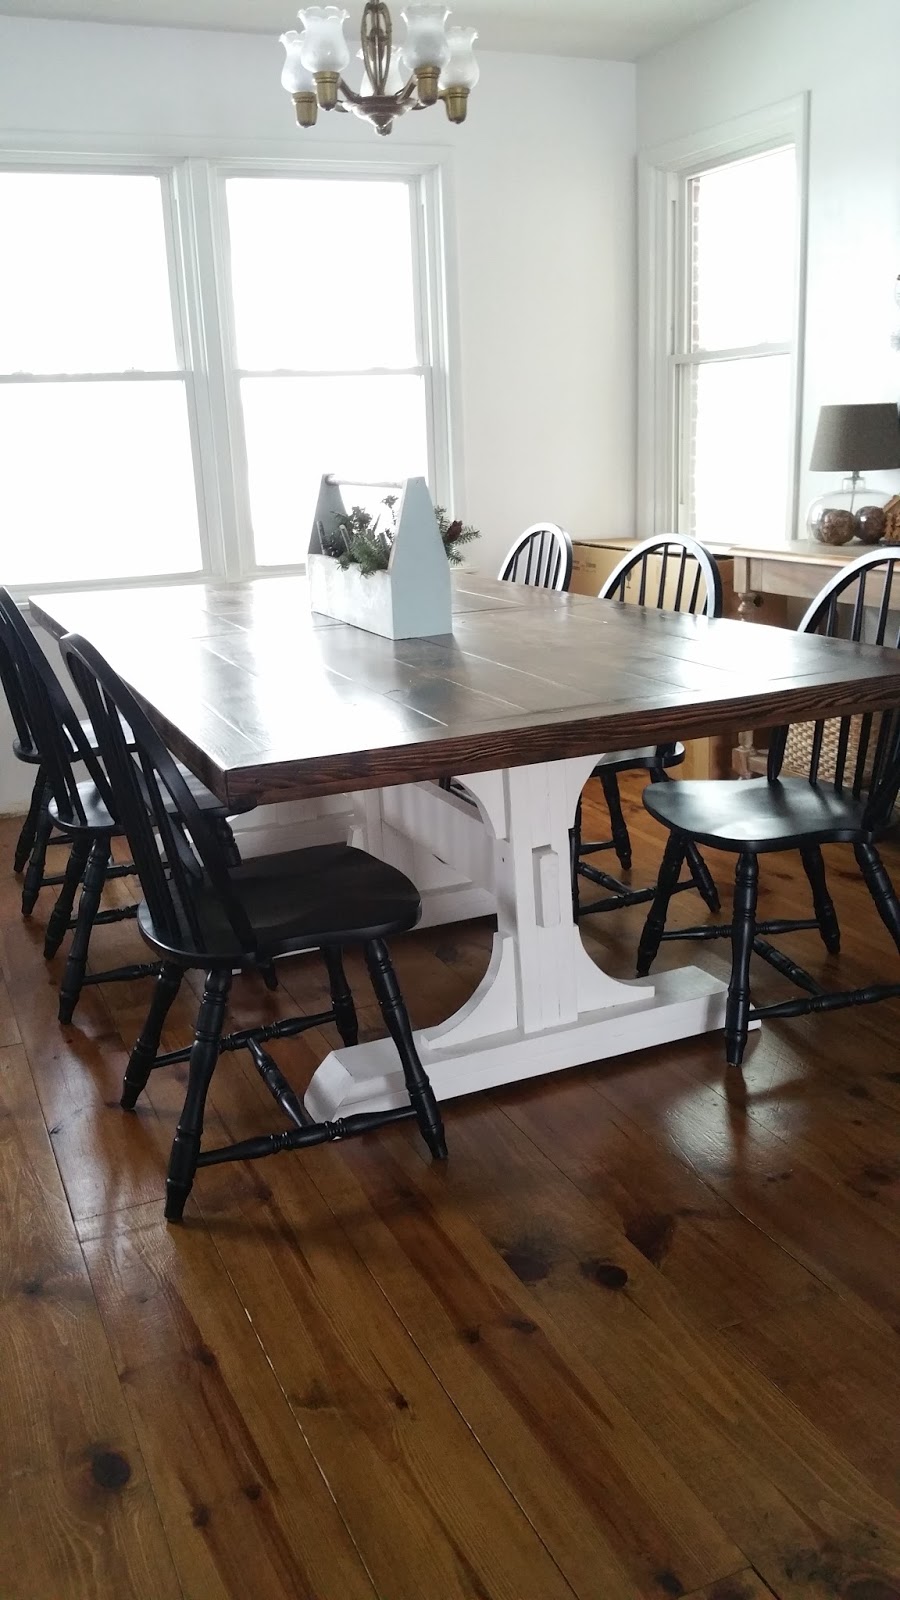
The perfect addition for Thanksgiving!
Thanks for taking a look!

Wednesday, February 24, 2016

Plywood Planked Walls

My kitchen has been unfinished since we moved in three years ago. We ripped out the old kitchen that used to be there as soon as we got the house. This is what it looked like.


And then it looked like this.


And then this.


We had a very pathetic kitchen for a little while. Yes, we had a utility sink in the kitchen.


Then we got (some) cabinets!


But our sink temporarily rested in our sink cabinet.....for three years.

Until I could replace it with this beauty.


For the walls and backsplash of our kitchen I had always planned to do beadboard panels. That is, until I came across this blog post from The House of Smiths. I totally fell in love with the look and the affordability of this idea. Plus, I knew I could tackle it by myself!

So I went to my local Lowes and purchased 1/4 inch utility grade plywood. I think it was around $13 for a 4x8 foot piece. I bought 4 panels and there was a very kind man there that cut each panel into 6 inch strips lengthwise. (And he didn't even charge me for it!). I also got some liquid nails to use for installing the planks.

So, I started with one wall at the top and made sure everything was level. I used the liquid nails and a brad nailer. The plywood is a very peculiar color but I new I would be painting them anyway. The walls were all torn up from ripping down the laminate backsplash. But they had a coat of white paint over the top. I used two nickels to space out the planks and wanted to make sure the cracks were white also.


One coat of semi-gloss paint up.


I even purchased one more 4x8 sheet so I had enough to carry the planks into the adjoining dining room.


Here is a semi-completed photo where I had already started on my next project!


 Some people call this shiplap but that is not really correct. Shiplap actually has a rabbet on each end that creates an overlap on the next board. But this is definitely a "shiplap look" and one that I am loving!

Thanks for stopping by!


Friday, February 5, 2016

Open Shelving Opinions

In my last post I talked about the plywood planks we have put up on our kitchen wall. Very soon they will be painted white. On either side of the window I am doing open shelving. But I need your help.


I first fell in love with this type of bracket. The price is a little higher but I also wasn't sure if it fit my style even though I LOVE it.


I started liking this type of bracket more and more. I think it might be a better fit with my style. Plus these are available at our local Menards store for a great price!


And there is this option.


But this is my dilemna. What color shelf and what color bracket? Initially I was thinking white for both. Keep in mind I will have a white background. Is that too much white? I also have white dishes I'm putting on the shelf. But I was also going to add in wood elements and some greenery to sit on the shelves. OR..Do you think stained shelf and white brackets? Also keep in mind that I will have stained wood countertops. The bottom cabinets will eventually be a darker teal color. And the third option is stained shelves and metal, black brackets. I do LOVE contrast and they would pop against the white background. I'm just not sure and I need your opinions, please. Here are some pictures depicting all three scenarios.


via Pinterest


What do you think? Should I keep it light and bright up top since I will have darker cabinets on the bottom and stained wood countertops? Or should I go with a bit of contrast with the other two options? And which style of bracket? Let me know what you think!!

Thursday, February 4, 2016

Kitchen Projects!

It's been awhile, I know. Almost a year, in fact. Things have settled down here a little more and I finally feel like I am in a better place to blog more.

I am working on some projects for our kitchen. We have lived with different stages of an unfinished kitchen for three years now. I'm ready to just have it done! I blogged about what I wanted done in the space back in 2012 here.

My ideas have changed a little but are mostly still the same. Here are the various stages of our kitchen history.


And what it looks like today.

I just recently started a new project that I will blog about very soon! Don't worry, it won't stay this way.

We also recently switched out our kitchen sink. We bought a farmhouse sink from Ikea about three years ago. It's been sitting in the box in our garage ever since. There were lots of other things that needed to get finished first and so it kept getting put off. I caved and bought a faucet that was not my dream faucet. My dream faucet had a much heftier price tag. Maybe some day I can afford it but for now, I like this one just fine.

Here is the sink we had.


And now doing dishes is ALMOST enjoyable.


Obviously there is a LOT of projects that still need to be done. We need countertops, painting done, the rest of our cabinets, and I am still putting open shelves on either side of this window. That will be my next post. Come back and check it out because I need your opinion. I'm on the fence for how to do my open shelves. Thanks for dropping by!