
Warning! Lengthy post ahead.
This is the story of our "fireplace". I put it in quotes because it isn't actually a working fireplace. But it's close enough to call it one.
When we moved in, this is how it looked.


The fireplace was big and ugly and useless. The fake logs lit up and made a sizzling sound. My father-in-law brought over a sledge hammer and went to work breaking up the entire fireplace. I used to have photos of the pile of rubble it became but I couldn't find them.
We primed and painted everything and laid down new wood floors. The fireplace got put on the back burner while we worked on other projects.

For a little while I positioned my bright yellow desk to fill the space of the empty fireplace. It was okay, but I really wanted a fireplace of some kind. A place to hang stockings at Christmas time.

I used the leftover flooring to replace the ugly laminate counters on either side of the fireplace spot. I blogged about that here. I also bought a fireplace surround, that I thought might work, from an estate sale.


But it didn't. It wasn't wide enough to cover the entire space. This is a good reminder to keep measurements in your purse of things you are on the lookout for! This surround is still sitting in my garage. It will be put out at our garage sale, or if any of you want it for any reason contact me.
In November I started to get anxious. I really wanted a fireplace for Christmas. So I bought the wood and got started. I had it drawn out in my head. I also loosely followed one of Ana White's plans found here. Except I knew I wanted a raised hearth. So I started with that first.


Then I laid the same wood we used for the floor and the counters across my box. I had to cut out a spot for the electrical outlet. I also stained and sealed the wood the same way I did to the desk counter.

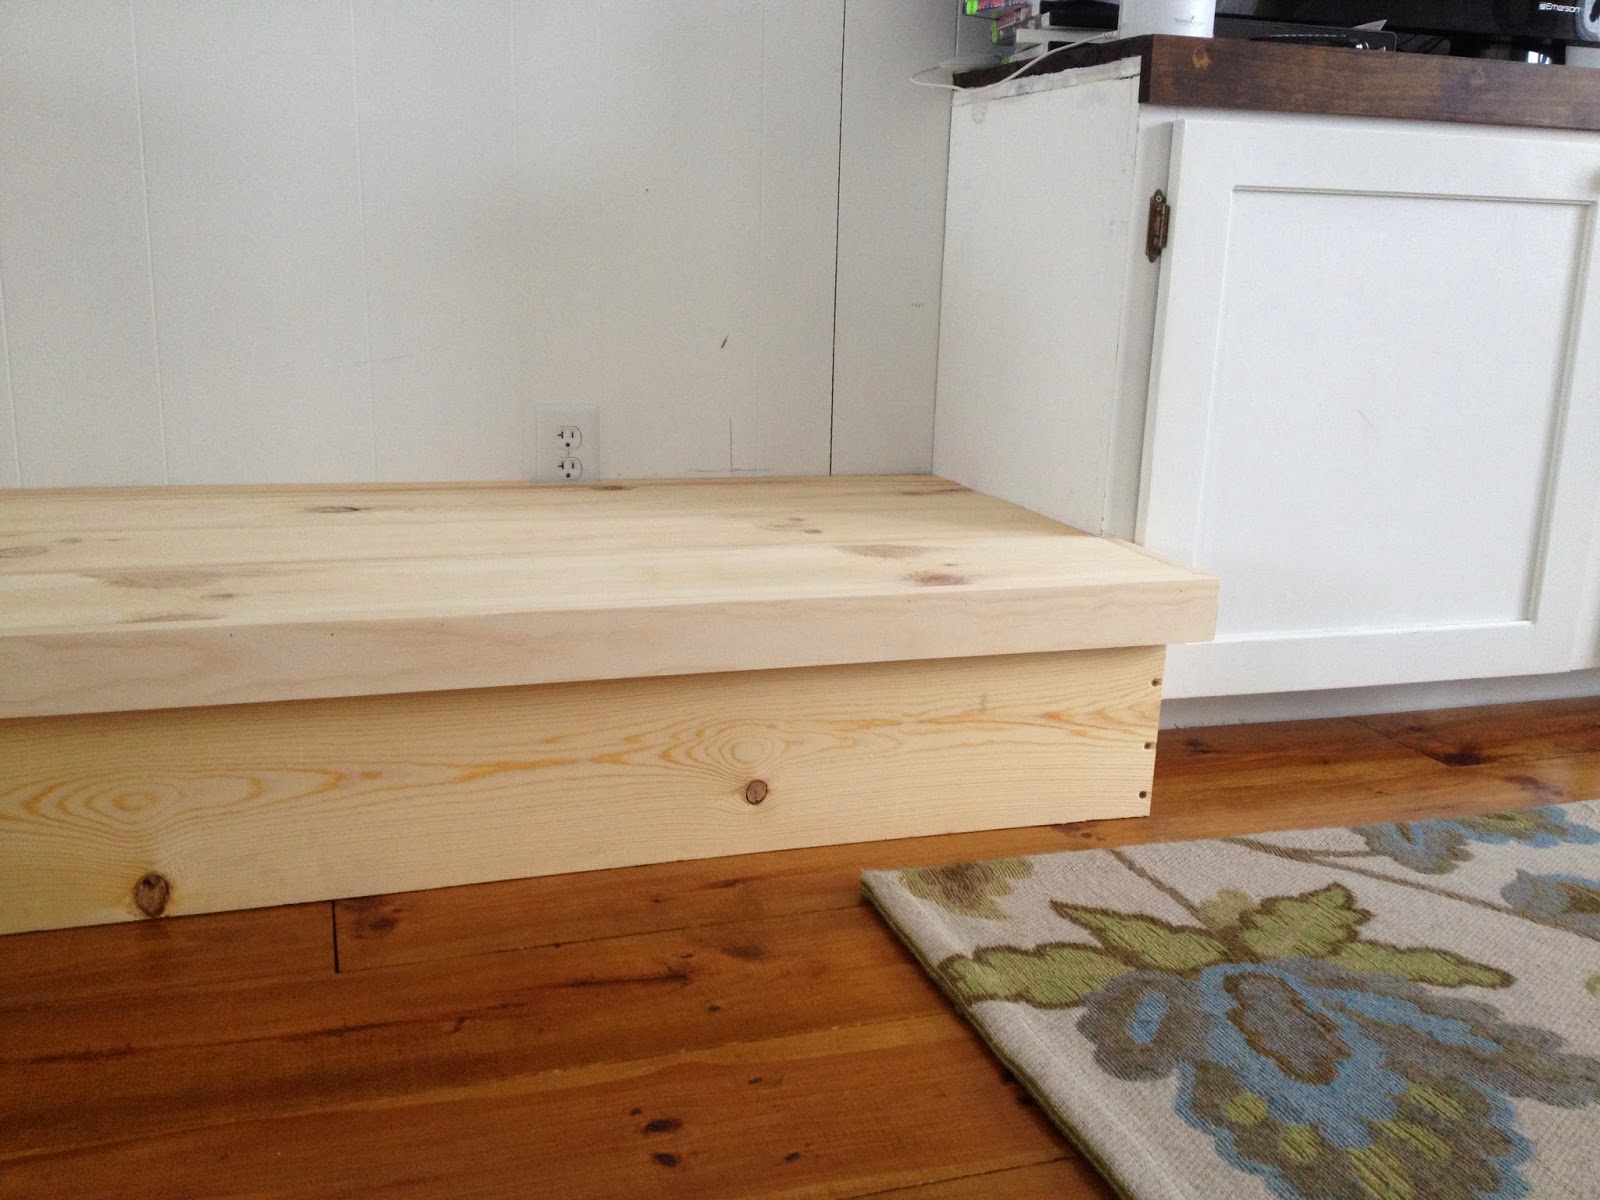


I then started to build my inside box. We had the intention of getting an electrical insert so I loosely based the dimensions on that.


After that I started using the ideas that are in Ana's plan for a faux fireplace. It is definitely different dimensions than what she had in her plan.


Then came the hard part. Mitered corners with boards that are applied at an angle. Let's just say I went through a few trial runs and had to make more trips back to the store for more wood. I have, in no way, mastered mitered corners.


I cheated a little on these pieces.


I then used wood putty to fill all the cracks and nail holes. Pay attention to the shelf of ironstone. It will be coming down very soon.

Next was paint after the putty and sanding. I also had black paint on hand and painted the inside of the fireplace.

The tile was next. I got this tile from Lowes and absolutely love it. Although it is not that easy to work with. It probably didn't help that I don't have the proper tools to cut it.


By this time we bought a temporary log set so that we could start getting some heat from our fireplace. You might also notice that we took down that shelf above the fireplace. I hung a beautiful boxwood wreath that I got as a Christmas present. I've been wanting one for so long. It helps to cover up the ugly up there. This is how it stayed for a little while.
I had already gotten boards from my back shed long before I got to this point. I have some beautiful tongue and groove old wood boards back there. Before the snow came I got a bunch out and brought them into my garage. All I did is wipe them down and leave them until I was ready for them. I wanted to stack them all the way up to the ceiling. The boards will solve a problem. The problem is that my mantel is too deep. It is about a foot and a half deep, which is a little weird. So my idea was to build it out and use the wood stacked up to the ceiling.


And here is how it ended up looking. I'm in love.

My table saw is inaccessible so I could not completely finish. I need to rip one more board down to fit in that tiny space at the very top. I'm also going to tile around the very innermost wood part of the fireplace. You can tell I didn't put the topcoat of paint on those boards. The problem is the vertical slats are not wide enough to tile with the type of tile I am using. So I'm going to add to it to build it a little wider. I've hesitated this long because we still weren't sure if we were going to get an electrical insert instead. If we do, the space has to be a very specific size to fit that and if I tile it won't be possible to change afterwards. This is the dilemma Do we just keep the fake birch logs that can heat 400 sq feet and go ahead and tile? Or do we wait to see about an insert and then tile once we know? I hate seeing it unfinished, but could live with it for a little while.
One thing is for sure- I need to start decorating my mantle!
This turned out beautiful! I love the look of the wood on the back wall. We are doing something similar in our house to replace a faux brick wall.
ReplyDeleteThanks Adrienne! Have fun building your project!
ReplyDeleteWOWZERS!!! That is so beautiful, impressive, and inspiring.
ReplyDeleteHow did you start learning wood working? Its something I really want to learn, but don't know where to start.
Sorry, Jessica! I missed your comment somehow. I kind of just dove in head first! I really study and think about a project first, before I even start. Ana White's plans make it soooo much easier. Look her up and I think you'll agree. Thanks so much for stopping by!
ReplyDeleteI like your fireplace. I would like to know what color is the stain of the box?
ReplyDeleteThanks Edison! I painted the back of the box black and the wood above the tile is Minwax dark walnut. :)
ReplyDeleteWhat are the dimensions of this and what sizes of wood? I love this!!!
DeleteFinished it is 54" tall and 61"wide. The boards I used were varying widths but mostly 1x3s, 1x6s and 1x8s. You could use whatever size you wanted to achieve the finished size you were looking for.
DeleteLove the final product and your pictures are so clear and easy to understand! I have been reading SO many tutorials and it seems like everyone has their own way of doing things. I think I will base mine after yours- thank you!
ReplyDeleteIt looks amazing! Nicely done!
ReplyDeleteThis is amazing!!!Thanks for the info!
ReplyDeletethanks this is good blog. the consumer guide
ReplyDelete